ACCESS YOUR BACK OFFICE
Create an admin user
- register an user (user data will stored and managed in TokTok, so you’d need to install Toktok locally) ;
- make this user an
admin(in TokTok) ;
Go to the back office
- log in (
adminlink in the default footer,/loginroute by default) ;
- go to the
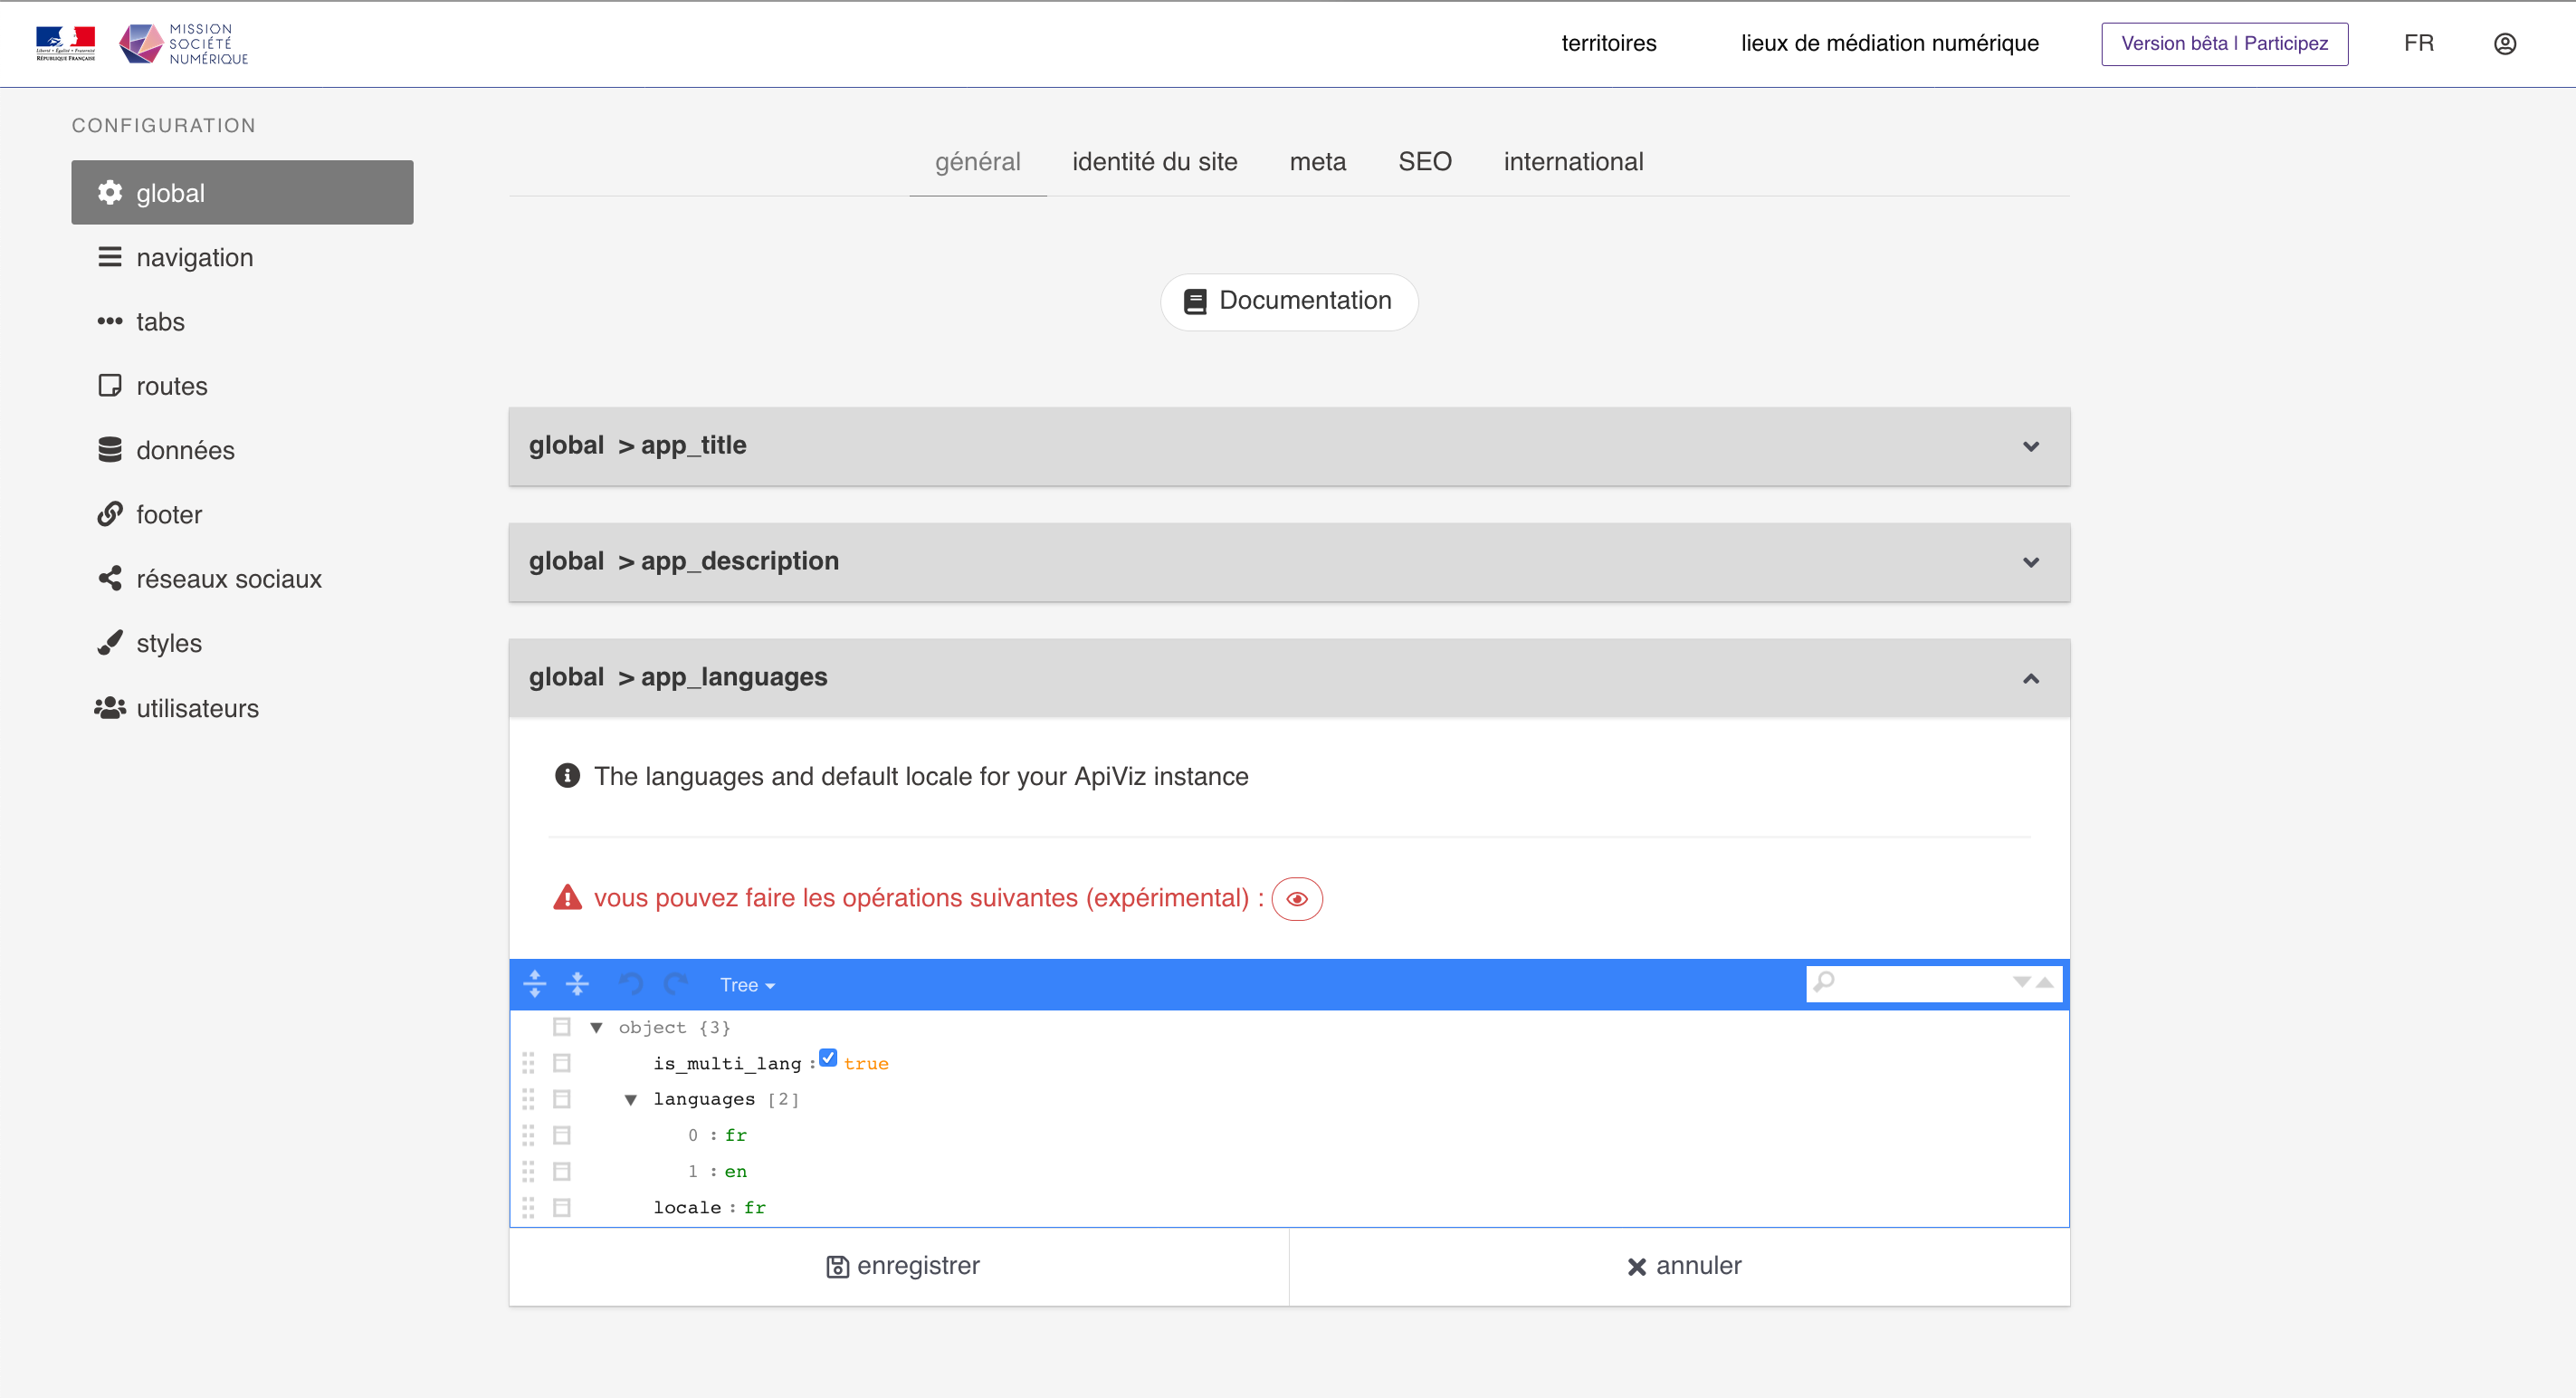
/backofficeroute by clicking on the buttonback office. You should now see this …
Configure your website
-
set up your ApiViz configuration :
- set up the global variables ; - set up your data endpoints ; - set up your authentication endpoints ; - set up your routes (pages must point out to html contents, f.e. on Github) ; - set up the styles ; - set up your navbar ; - set up your footer ; -
save your configuration. You should immediatly see the result.
-
To know more about the back-office please read the back-office tutorial
(optional) redeploy
- deploy (if not done already) and enjoy ;
More detailed configuration documentation on its way…