INSTALLATION WALKTHROUGH
Warning
Before anything you need to install Apiviz-backend to serve your configuration to the frontend.
Set an new UUID
Generate a new UUID
you can use online websites like Online UUID Generator to do so
Create a .env file at the root and copy your UUID within
your .env fiel content
NUXT_APIVIZ_UUID=<your-UUID>
DEPLOY_ENV=NETLIFY
APIVIZ_REPO=/apiviz-frontend/
NUXT_BACKEND_MODE=default
Build and run
You have two different options to run (locally) Apiviz on your computer/server : with Node or with Docker, depending where your heart leans…
option 1 - Build setup with Docker
Note : this configuration needs Docker previously installed on your computer/server
# install / stop / restart
make up # run app with Docker
Other options for managing the app with Docker
make restart # restart app with Docker
make down # stop app with Docker
… then check in your browser : localhost:3001
see also : memo for Docker
option 2 - build setup with Node/Nuxt
Note : this configuration needs Node previously installed on your computer/server
# install dependencies
npm install

# serve with hot reload at localhost:3000
# get env vars from .env file
npm run dev
… then check in your browser : localhost:3001
Other options for deployment :
# overwrites .env file with env vars from script in package.json
npm run dev-test

# get env vars from .env file but overwrites NUXT_BACKEND_MODE as local backend served with Docker
npm run dev-docker

# build for production and launch server
npm run build
npm start

# generate static project
npm run generate
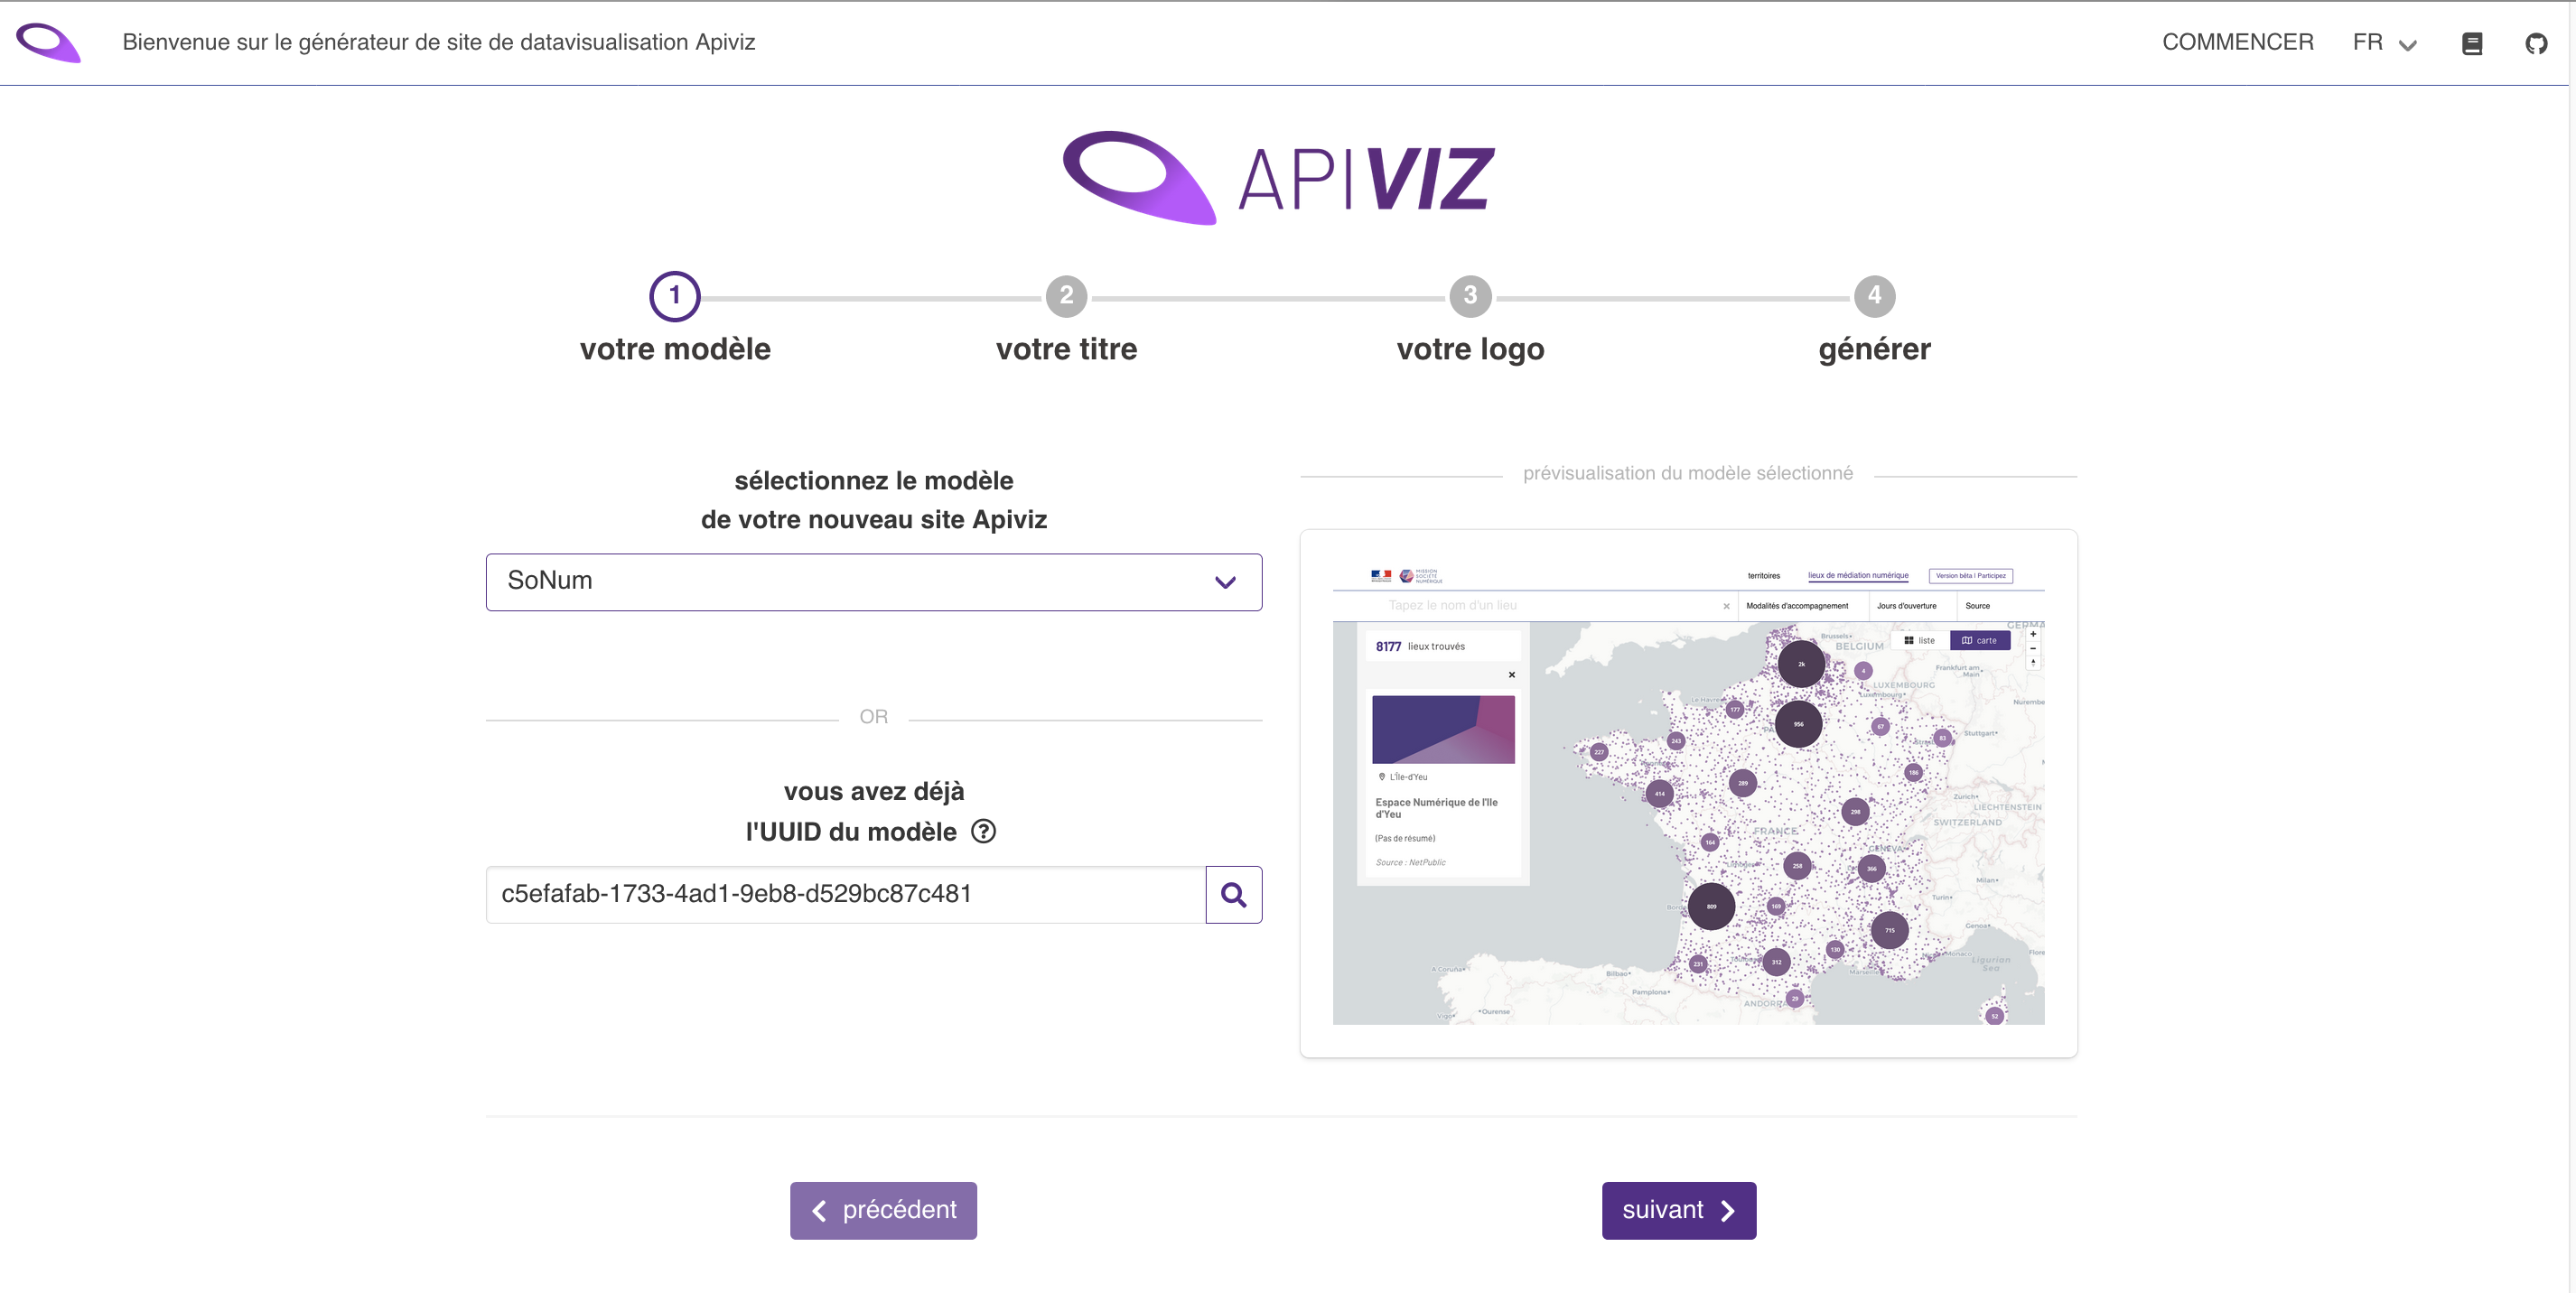
A new website from scratch based on a model
If you generated a new UUID (not based on the default UUID from the original repo) you should now see the Apiviz instance creation form (aka the dataviz website generator).

Now you just have to follow the instructions to generate a brand new data visualisation website, and in a couple of steps your website will be set up …